Making Megan’s Box
The following is the letter for Megan’s Box.
Dear Megan,
Congratulations and Happy Birthday!
My wife Marion and I are pleased that we were chosen to make this box for you. And, we would like to tell you the story of how it was made.
It began with a phone call from your Grandmother Sally. She found our company on the internet when she was looking for a gift for you to celebrate your birthday and your christening. After learning what your Grandmother needed, we began the process of making your box. Grandma Sally also asked us to make a record of how we made your box. We decided to make take pictures of each part of the process and put them on a compact disk for you to keep.


The first step is to make a scale drawing of the box so we know what size wood we need and to make sure everything fits together. We have enclosed the original shop drawings for you to keep if you like.
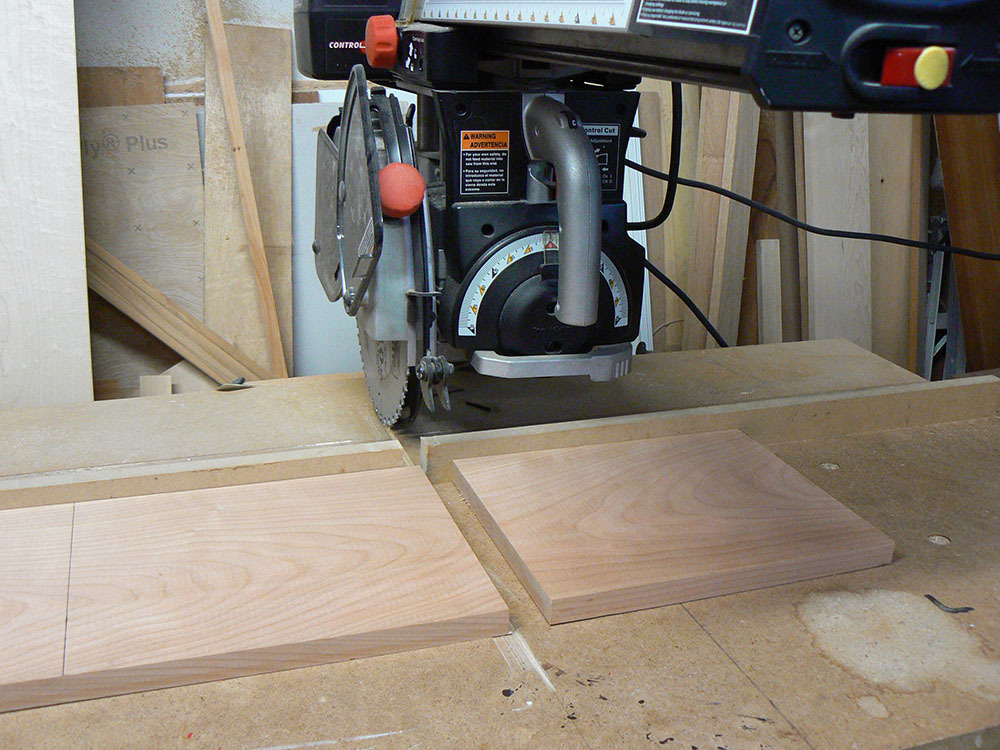
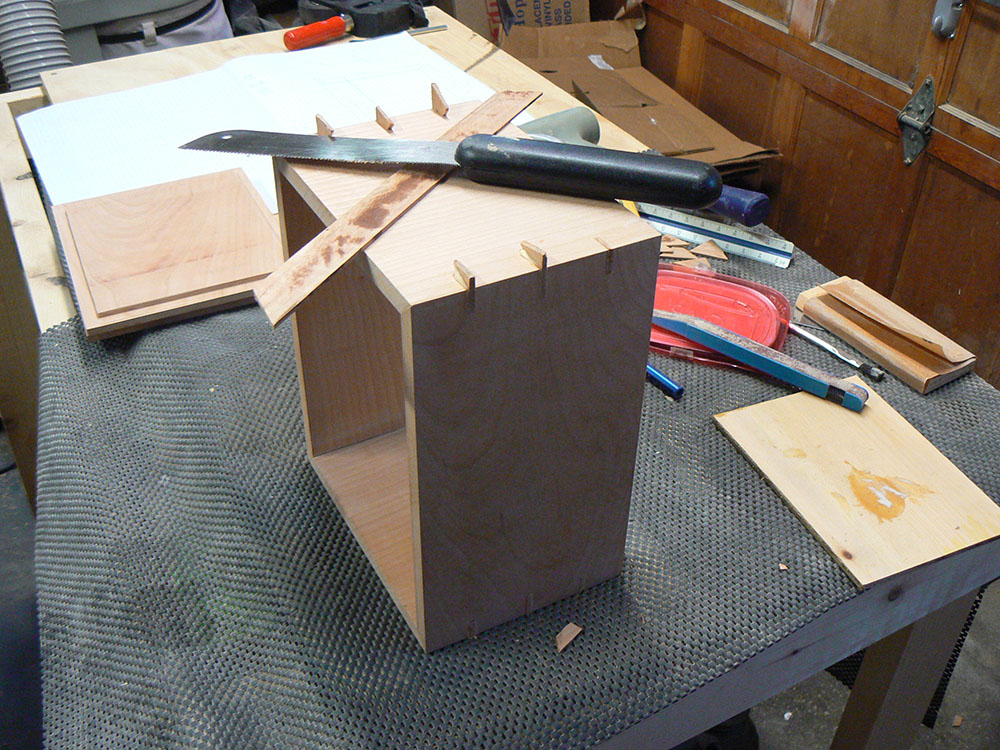
Then we went to a place called Goodrich Lumber Company in Kingston, Massachusetts and selected a 9 foot long cherry board that had just the right look. We carefully transported it to our workshop in Abington, Massachusetts. Then we had to measure the board and decide where to make cuts so we would end up with the right sizes to form your box. This is called “LAYING OUT THE BOARD”. Next, we put the 9 foot board on a very powerful machine called a radial arm saw to cut the board into smaller pieces. This is what we call the “FIRST CUT”.
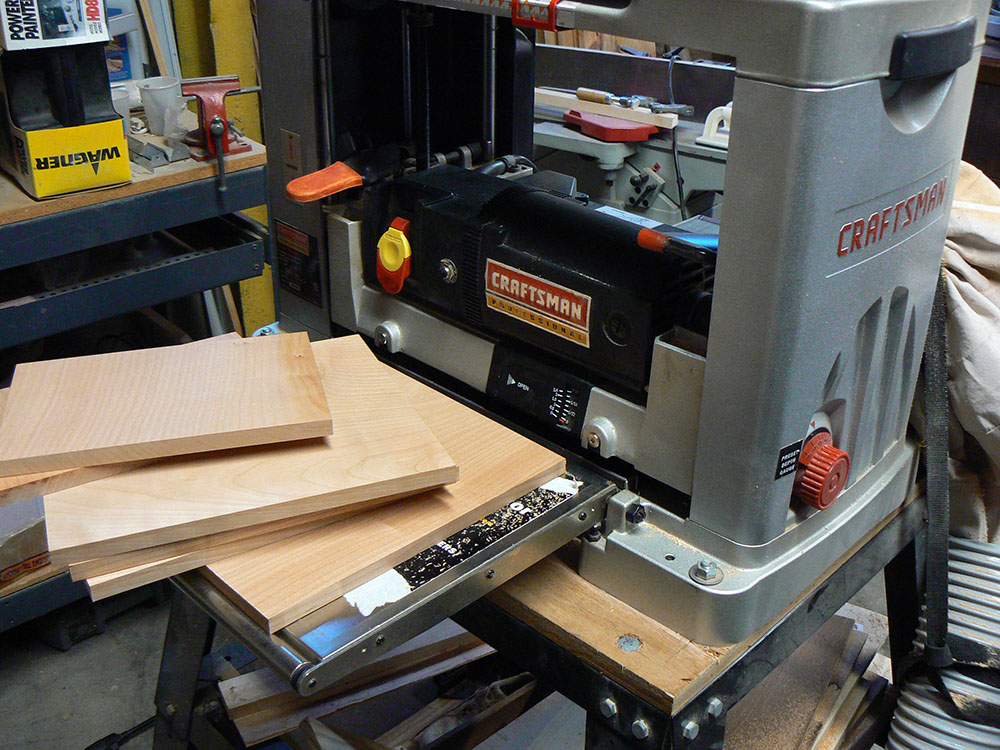
Now we have six smaller boards that will eventually become MEGAN’S BOX. The board that we selected was too thick so we had to reduce the thickness to about a half an inch using another machine called a “THICKNESS PLANER”. The boards, all 6 of them, have to go through the machine one at a time in a particular way so they don’t get damaged. And, we have to do this several times. Each time through the machine, the blades inside remove a tiny amount of wood thinner than a piece of paper. The machine is very, very loud! We had to plug our ears!
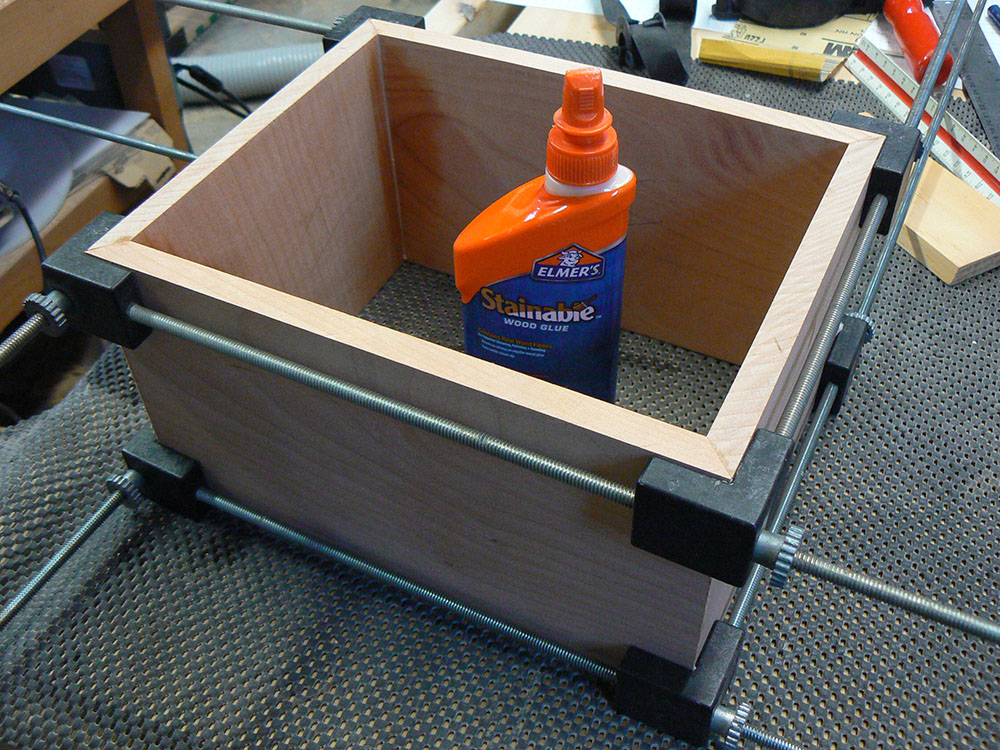
Next, we took the four boards that will form the sides of the box and glued them together. This is called the “FIRST GLUE UP”. We used big clamps that screw together and hold the sides in place so the glue can dry. There are lots of kinds of glue available, but we like Elmer’s Wood Glue. You might have used Elmer’s glue in school. Ours is similar but its light brown in color instead of white because it has tiny little fibers in it so it will bond with wood.
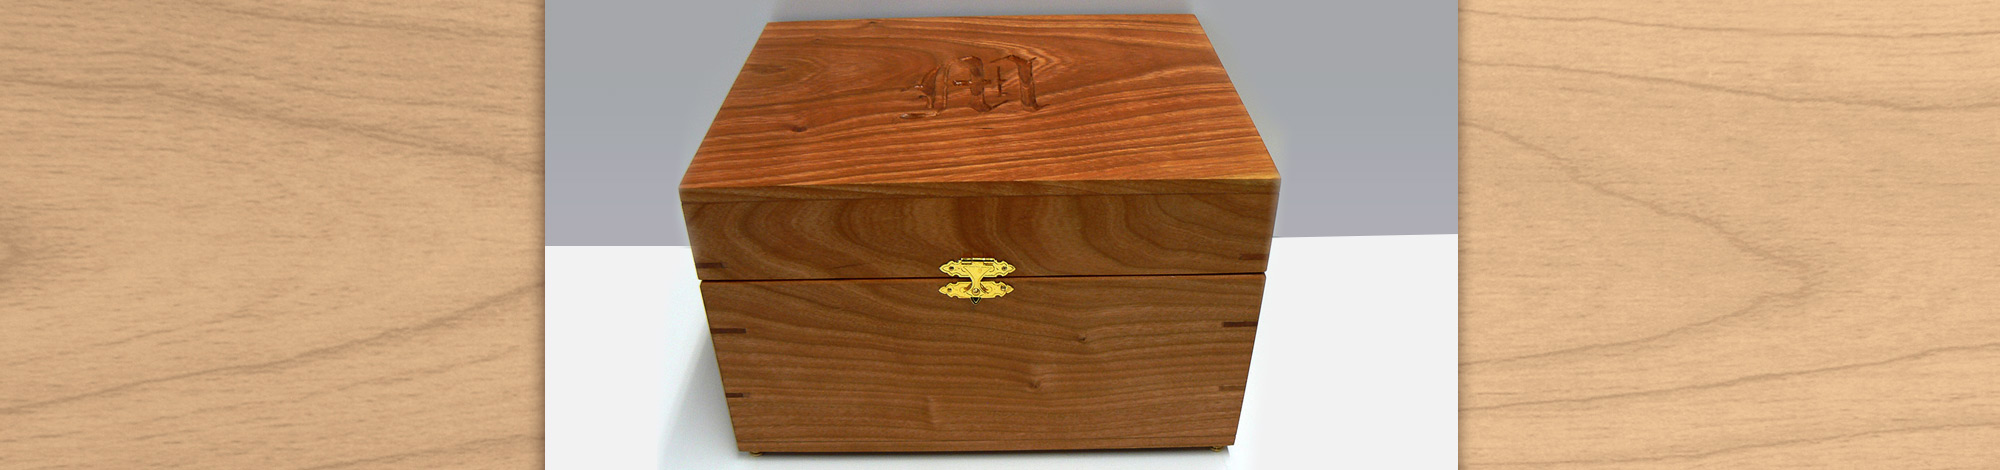
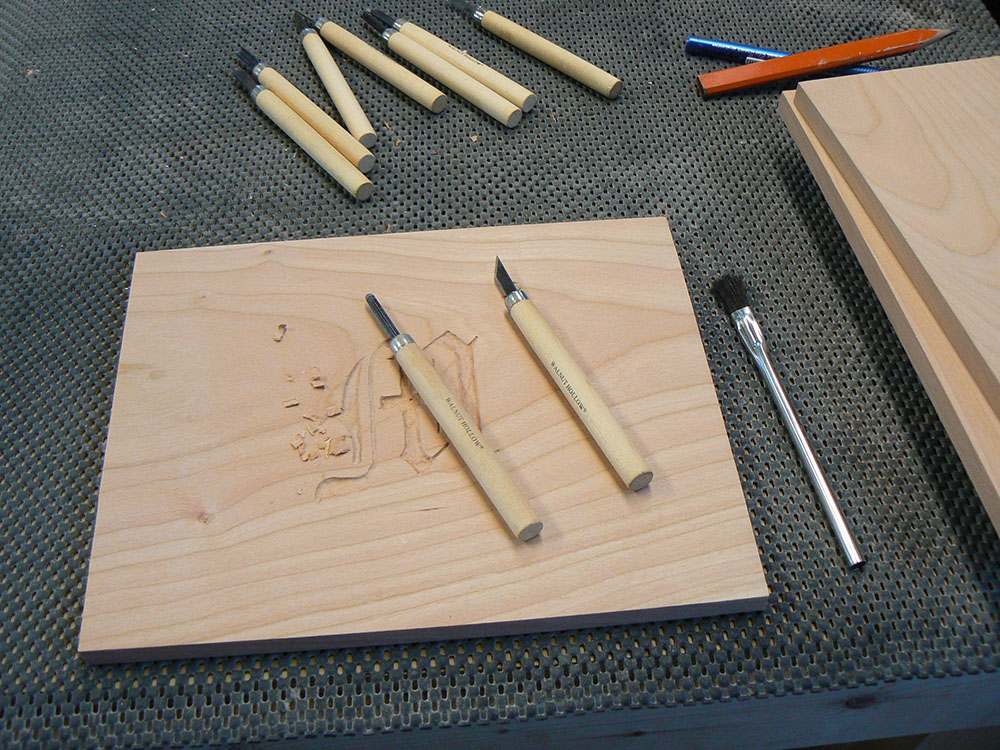
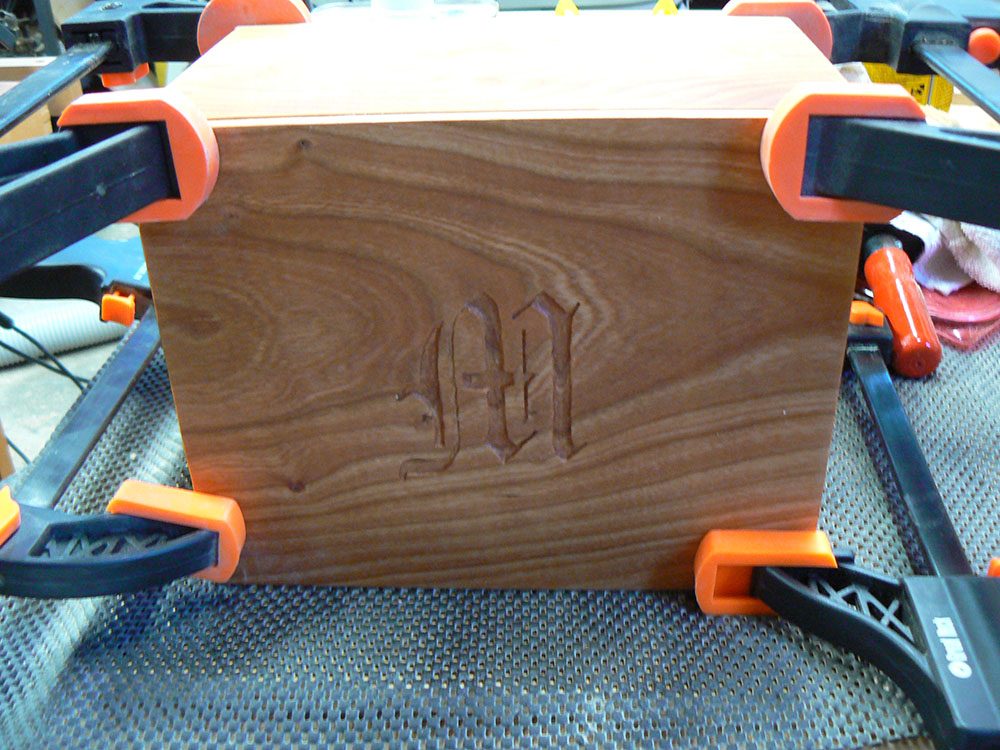
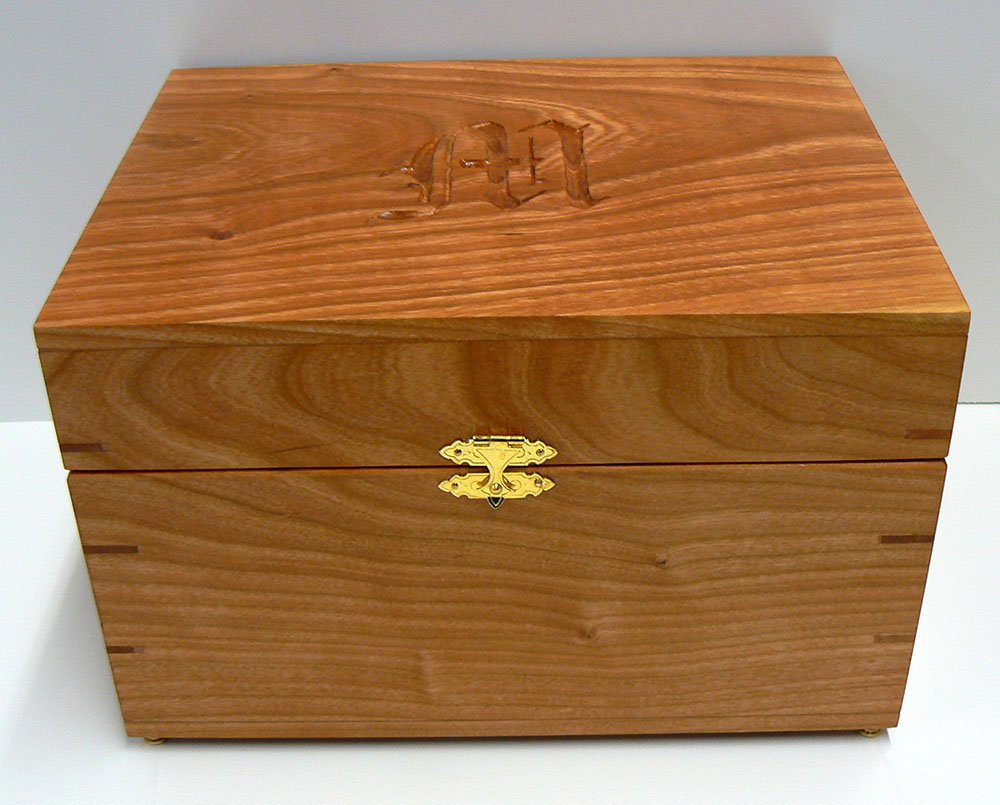
Next comes the fun part! While the glue was drying we decided to carve your initial, the letter “M” into the middle of the top board. I got to sit down with a cup of coffee and listen to some soft music while I carved out your M using small tools called carving knives. I used a style called Early English, a kind of letter called a font. Do you know what a font is? If you don’t, I’ll bet that Grandma Sally can help explain it to you.
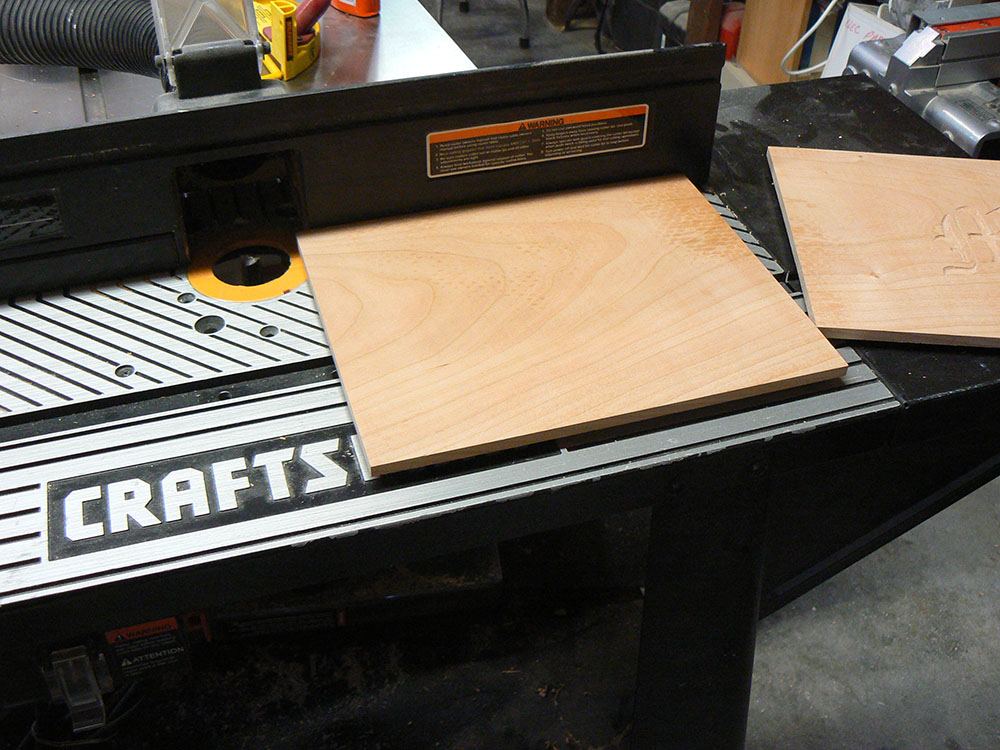
Then we had to “SHAPE THE TOP AND BOTTOM” so it would fit together with the 4 sides. We used a machine called a Shaper for that. It’s another noisy machine so we had to plug our ears again! We don’t actually stick our fingers in our ears though. We used a kind of ear protection that look like ear muffs. They fit over your head and stop some of the noise but not all of it. At least the noise doesn’t hurt your ears!
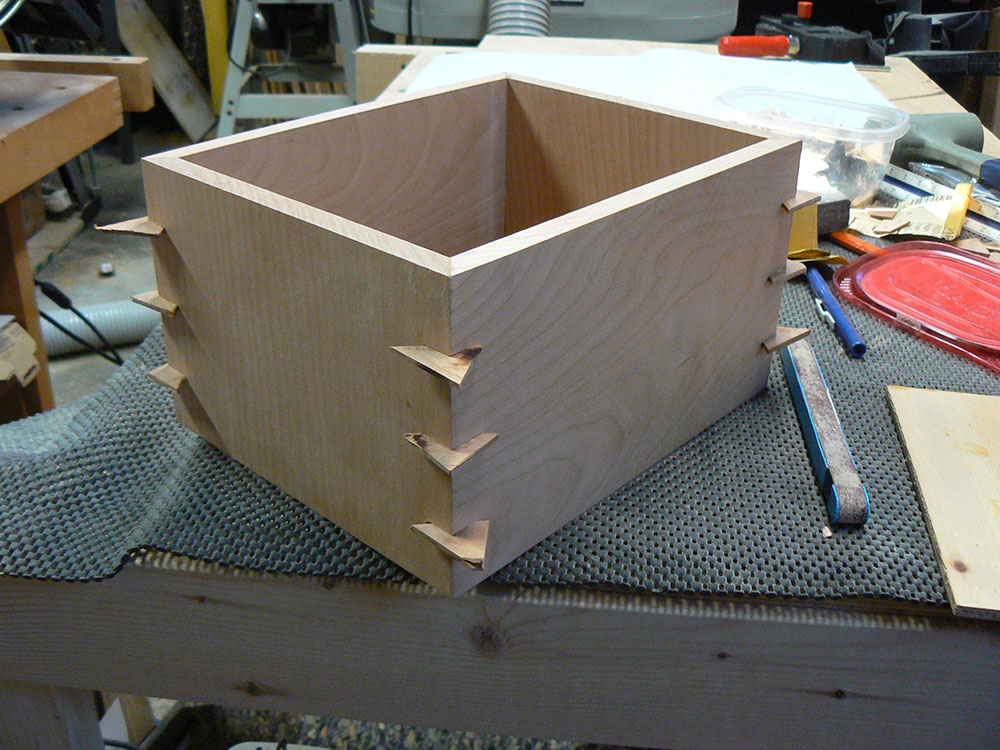
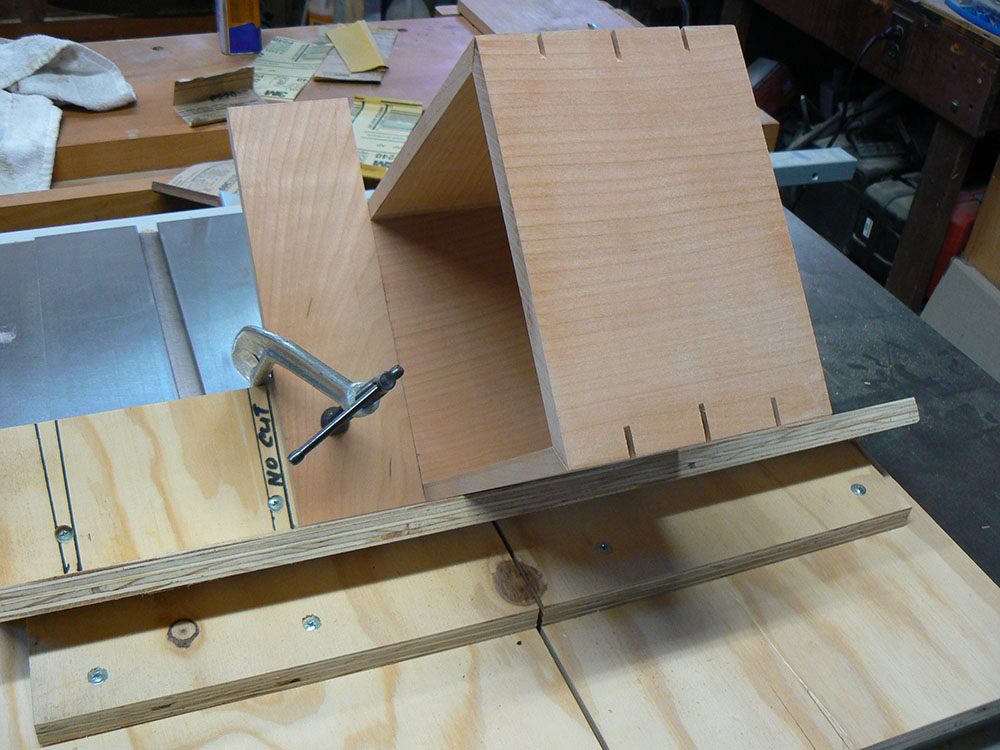
Sometimes the glue by itself is not strong enough to hold the box together for a long time. So, we added what we call “splines” to the corners. These are little triangular pieces of wood, called Bass Wood, that we cut into the corners, glue in place, and then cut them off so they are smooth like the sides of the box. First we used a wooden tool called a jig. This is like a cradle that held your box in place so our machine, called a table saw, can cut little notches in the corners of your box. This process is called “CUTTING SPLINES”. Then we have to “PUT THE SPLINES IN PLACE” by dunking them in glue and tapping them into the notches that we cut using the jig. When the glue was dry we used a process called “FLUSH CUTTING THE SPLINES” to hand cut or “flush cut” the splines so they are smooth like the sides of the box. This makes the box stronger and also makes it look nice.
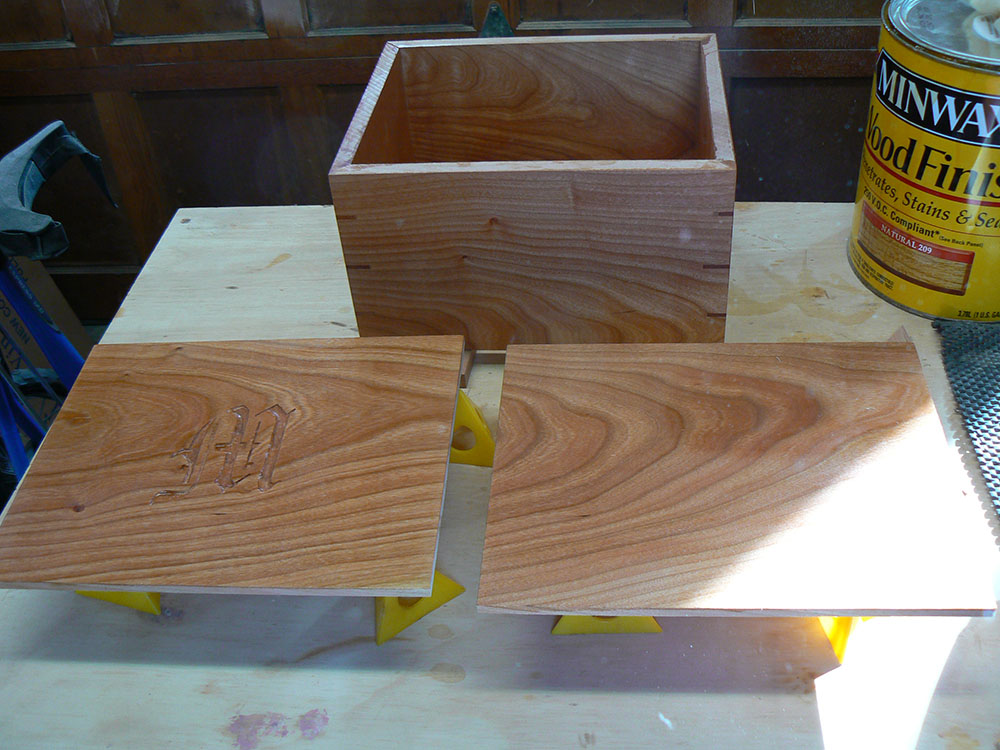
Before we could glue the top and bottom together, we put on the “FIRST COAT OF STAIN”. It is easier to stain some parts of the box before we put it together. And, we used clear natural stain to seal the wood and bring out the natural grain of the wood so you can see it better. The grain is actually formed by growth rings of the tree that the wood came from. Every year that the tree was alive, it left a ring that shows how much it grew that year. If you could count all the rings, you could tell how old the tree is. If the tree was eight years old like you, it would have eight rings. This tree is much older than that.
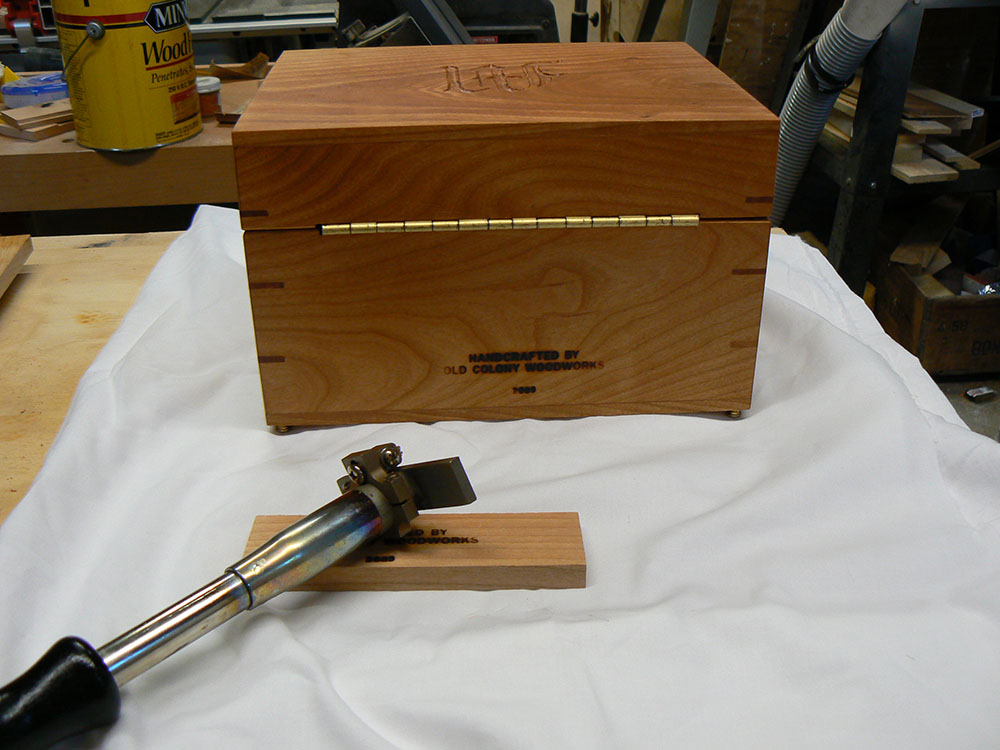
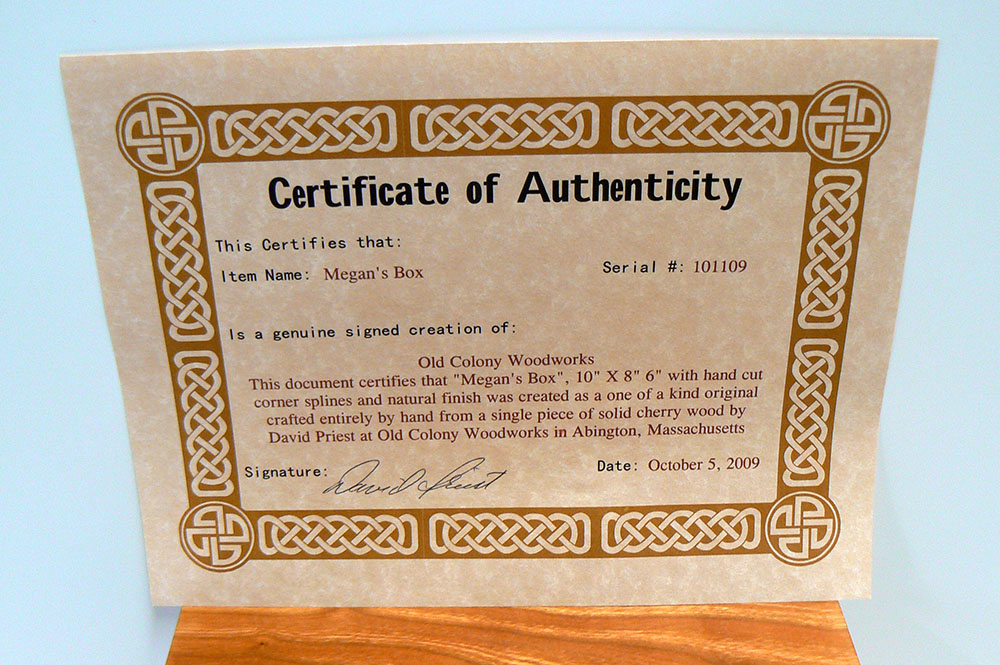
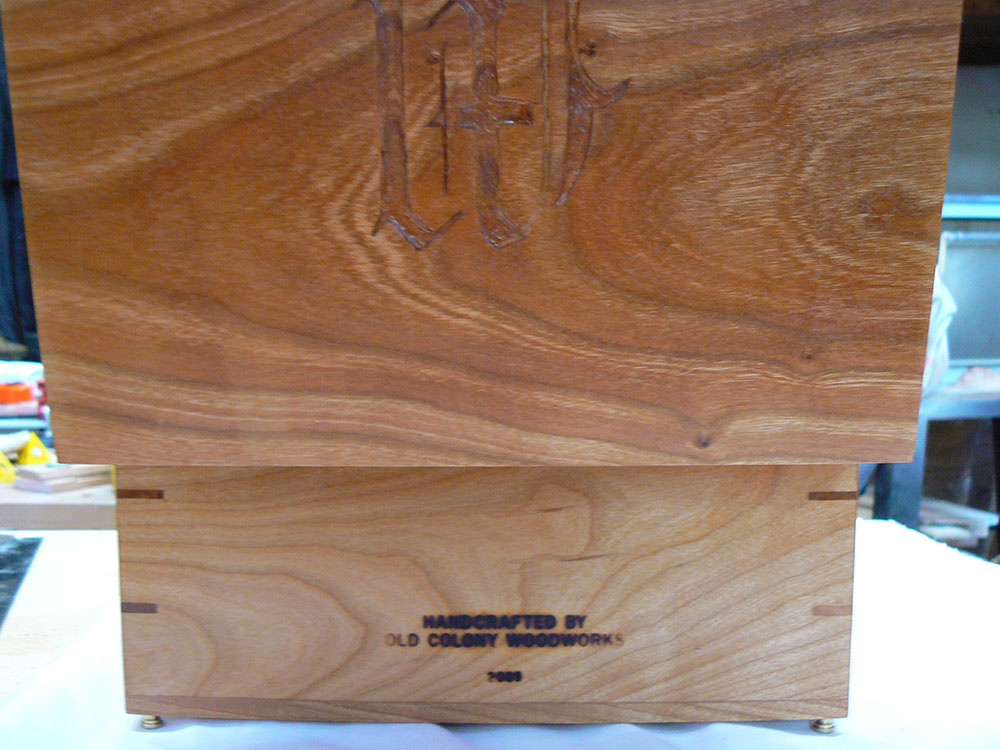
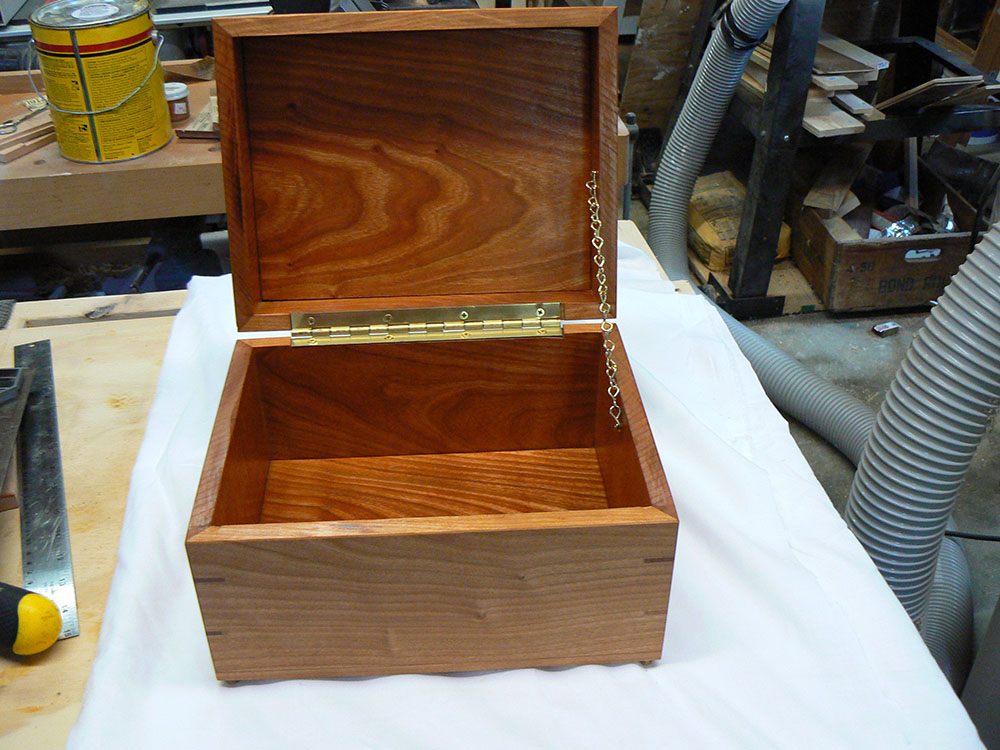
Now the box is almost finished. We had to let the stain dry overnight then sanded the box to make it smooth. Then another coat of stain and another night to dry. Finally, we cut open the lid, put the hinge on, and added our name with a branding iron so you will always know that we made the box for you. The branding iron is a very hot metal rod that has the name of our company on the end only the letters are backwards. By holding the hot branding iron against the wood for about 25 seconds, the letters are burned into the wood in such a way that you can always read them. Always.
Now I have to put this letter into your box along with the disk so I can ship it to your house. It has been lots of fun making your box for you. I hope you like it and will always remember who made it for you.
Sincerely,
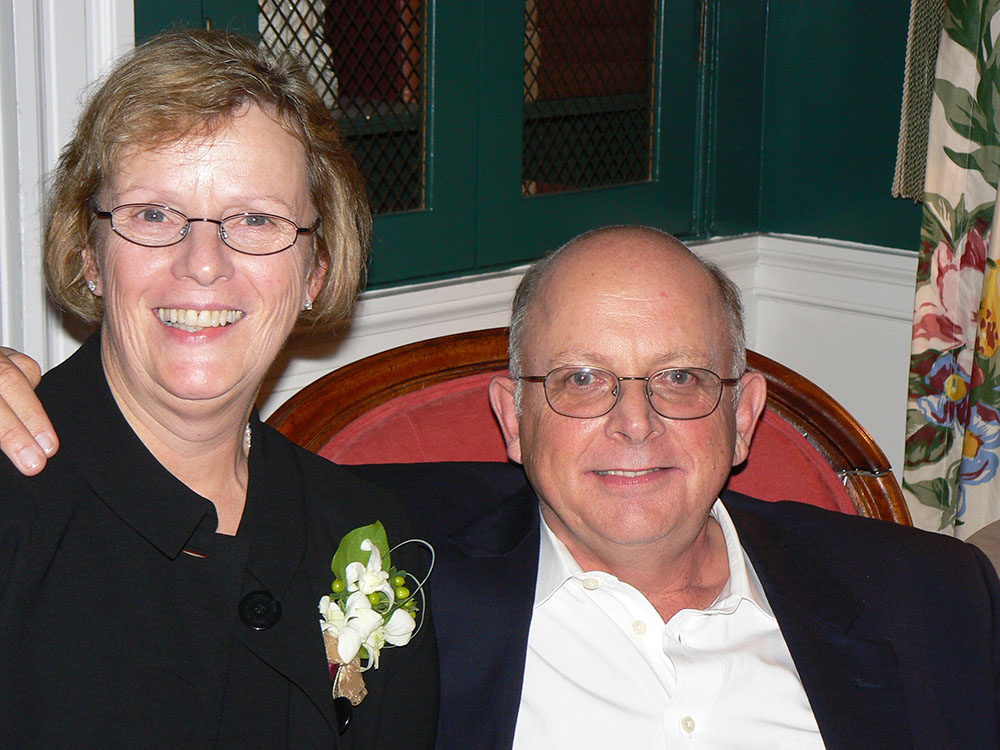
Dave & Marion Priest